Follow us!

See our current kit selection!

Friday, October 21, 2011

Weekly Tips & Techniques: Stretching your stickers!

This week's tip is brought to you from the Fancy Pants blog, "Miss Fancy Pants". Here Lisa shows you more ways to use your stickers using the October 31st sticker sheet (available at Capture!) After reading this I can't wait to dig into my sticker stash to see how else they can be used! Hopefully it will inspire you as well!

Happy Scrapping!

-Jess

1 Product, 2 Ways: Oct. 31 Elements Stickers

LisaSaundersFramed
I’ve been creating with the Element Stickers from the Oct. 31 line this week. I love finding different ways of using the same product. So when I got asked to use the Element Stickers in 2 ways I knew instantly what I was going to do.
I really have used the one product in 2 ways.


SBC_fp-1299

First of all I made this LO here.


Lisa Saunders - Haunted House


I’ve used the patterned papers from the October 31 line as my base. I wanted to use the Element Stickers but give them a bit of life. Stickers are great, but can appear flat sometimes. So I’ve stuck these on to black card and then cut around to show a black edge. Some of the stickers I’ve just stuck down using double sided tape and some of them with 3d foam tape. I like seeing the variation of heights. You can see a close up here. The stickers now pop!

Lisa Saunders - Haunted House Close Up

 Now I am left with a sticker sheet looking like this.

Lisa Saunders - Haunted House Stickers


There are empty spaces where I have used some of the stickers on my first project. It’s the empty spaces that I’m now going to use on my next LO.

I have carefully cut around the used stickers. You can see the outline of where the sticker has been removed. This is where I have cut and this then gives me a new sticker. I’ve lightly placed this sticker onto the LO and then misted over it. The sticker can then be lifted and you are then left with this effect. They make perfect masks for misting.

Lisa Saunders - Thumbs Up close 2

I used some of the stickers from the ‘off to school’ collection. I separated these banners, stuck them onto white card and cut them out. By punching two holes into each flag I’ve been able to thread some twine through and turn them into a string of bunting. They’ve been stuck down with 3d foam tape.

Lisa Saunders - Haunted House Stickers.2
 
I also used a part on the scalloped edge border sticker to stick on the page and mist over. This gives a great effect. The sticker can still be used. I ended up using it on the bottom of the first LO above. The mist has given it a great shimmery look.
Here is the finished LO.

Lisa Saunders - Thumbs Up

It really is possible to use the one sheet of Element Stickers in 2 ways : )

LisaSaunders
-Lisa Saunders

Wednesday, October 19, 2011

This Week At Capture (10/17 - 10/23)

Here's what's going on this week at Capture:

Thursday, 10/20
Thursday Page Club: 7-8pm

Oct 20

 Make one 12x12 layout for just $5 while you spend some time with friends!


Friday, 10/21
Crochet Class: 6-8pm

Crochet Scarf

Join Jessica this Friday evening and learn how to crochet! Already know how? Come in and use the workroom for free while you finish up your knitting/crocheting project and meet new friends!


$6 if you bring in your own hook & yarn, $12 if we provide it for you.


Saturday, 10/22
Just Cards: 1-3pm

Just Cards Oct 11

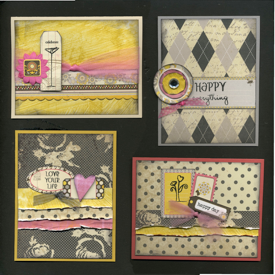
Make these 4 gorgeous cards that are perfect for any occasion!


Scrap Night: 6-11pm

Photobucket

Spend a fun evening working on your projects, spending time with friends, meeting new people and getting some new ideas.  Light refreshments will be served.  Use of our tools and cutting systems is included. $10 for the evening.


Sunday, 10/23
Halloween Pages #1: 1-3pm

halloween page 2
halloween page 1

Celebrate Halloween in style with these four great pages by Angela!
$20 for 4 pages


For information on these classes and more, visit www.shopcapture.com, or call 970-484-0595

Wednesday, October 12, 2011

Weekly Tips & Techniques: Journaling

Have you, like me, been stuck in a non-journaling rut lately? It can seem so tricky and intimidating! But journaling is important to scrapbooking, and can help those looking at your layouts understand what is going on in the pictures and who is in them.

It doesn't have to be so hard! Here are a few tips to get you in the groove with journaling:

1. Wait until later to do it.

When you start to write do you find yourself frozen with nothing but a blank stare while you struggle to come up with something to say about the layout you just created? That might be because when you create pages, you're using your  right-brain activity. When you are writing, you're using your left-brain activity. It can be so hard to switch back and forth between the two! Don't stop your creative layout process when you are on a roll. Simply make a space for your journaling and come back to it later. (But don't wait too long or you will forget important details about the event or forget to do it altogether.) A good idea would be to wait until you are done with your layouts from that particular event and then go back for the journaling.

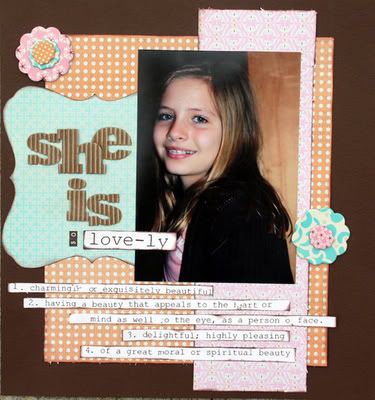
2. Use a dictionary and a thesaurus.

Sometimes it's as simple as using a particular word for your title and then putting the definition of that word under it as your journaling. It's a basic and quick way to add a bit of wording to your layout, especially for pictures that don't need a lot of explaining or details. Here is a layout I found at A Cherry On Top for example:
journaling using dictionary


Using a thesaurus is always helpful in finding more descriptive words to replace ones you might use too often (like I do!) or ones that just aren't quite cutting it.

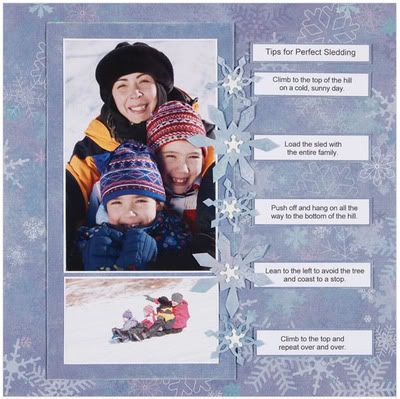
3. Just document the facts.

You don't have to struggle to come up with a clever or witty way to describe what is happening in your photos. Simply jotting down the facts will do! A good way to make this more visually appealing is to use bullet points or strips of paper for each sentence. Don't forget to include the date and who is pictured! Here's a layout from Simply Special Crafts for inspiration:
journaling using bullet points


4. Use song lyrics, poems or quotes.

This is a wonderful "cheat" when it comes to journaling. A great source of inspiration can come from your favorite song or poem, and quotes can be perfect for capturing the feeling of a photo or event! There are plenty of resources out there available for purchase, but I find the best source is Google. ;-)

5. Do an interview.

Some of the most amusing journaling spots I've seen are interviews with the person(s) pictured. This is especially cute when it's with children! Get the "Who, What, When, Where and Why" and you can either copy it down word for word or use it as your inspiration.

6. Don't sweat it!

Scrapbooking is supposed to be a fun stress reliever, not something to worry about! If you find yourself really straining to come up with something to write down on your layout, maybe that particular page doesn't NEED any journaling. When I'm deciding what to write and I can't think of anything at all, I ask myself, "if I wasn't around to talk about this layout, would the person looking at it know what was going on? Does it need any explanation?" If a layout simply doesn't need journaling to accompany it, just let the picture do the talking. After all, a picture is worth a thousand words!

Once the content of your journaling is decided, you'll want some creative ways to display it. I like hand written journaling best, since it gives the page a more personal feel. If you are unhappy with your handwriting, practice on some scrap paper first until you get used to it. I like to practice first just to get my spacing right. If there is just NO way you want your own handwriting on your layout, you can always type it up and print it off. This is especially handy for the longer stories you want to document. But keep in mind a loved one would be thrilled to see the personal touch of your own writing, no matter how YOU think it looks. :-)

Here are some creative ways to display your journaling:

*Use it as a border, next to or in place of a strip of patterned paper or ribbon.
*Write around a photo.
*Journal in a shape (a basic heart or circle is great, or use a more funky shape, like a child's handprint)
*Use pre-made journaling tabs, mats or stickers.
* Journal inside or around a stamped shape, or use a lined stamp made for journaling.
*Create a hidden journaling spot on a tag or scrap of paper that gets tucked into a pocket or flap. This is especially nice for mini albums that don't have a lot of room for both the photos and the journaling!

Remember, there are no mistakes in scrapbooking, just opportunities for embellishment. So if you've goofed up your writing, look at it as practice and cover it up with another piece of paper! :-)

I hope this has given you some tips and inspired you to write more on your scrapbook pages! Click here for more great tips on journaling.

Happy Scrapping!

-Jess

Monday, October 10, 2011

This Week At Capture (10/10 - 10/16)

Here's what's coming up this week at Capture:

Thursday, Oct. 13th
Thursday Page Club: 7-8pm

Oct 13


Make one great 12x12  page while you visit with friends!
Only $5!


Friday, Oct. 14th
Scrap Night: 6-11pm

Photobucket

Spend a fun evening working on your craft projects while you meet new people and enjoy some refreshments! Just $10 for the evening.


Saturday, Oct. 15th
Limited Edition Fall Album: 1-3pm ( $30 )

L.E.Fall Album

Capture your favorite fall memories with this elegant Fall Album! These pics don't do it justice at all! The completed album measures 6x12 with each page getting wider than the one before it, creating a cascade of autumn colors. As of this blog post there are only THREE (3) kits left for this class, so be sure to sign up right away!


Sunday, Oct. 16th
Just Pages: 1-3pm

Just Pages 1Just Pages 2

The October Just Pages features two single pages and one 2-page spread that will be perfect for any occasion!
$20 for 4 pages


For information on these and other events, call 970-484-0595 or visit www.shopcapture.com.
Don't forget to follow us on Facebook for exclusive deals and pics of brand new product as it hits the floor!

Friday, October 7, 2011

New Specials and the October Coupons!

If you're not following our Facebook Fan Page yet, you should be! We have special deals and promos just for our Facebook Fans! Check it out...

Our newest "Check In" deal will be starting this weekend: check in 2 times on your mobile device (on either Facebook or Foursquare) and when you buy one kit, you'll get a second one half off! (Discounted kit must be of equal or lesser value. Offer expires 10/31/2011)

Our "Check In" deals change periodically, so check back and check in often!

Also on Facebook, starting this week we'll be having a "Facebook Fan of  the Week"! The rules are simple: create a project using materials purchased at Capture, post a pic of it on our Fan Page, and we will pick one lucky winner each week to enjoy 15% off their next purchase! You have to be a "fan" to participate, so be sure to "like" us and then get working on your Capture project! Our first drawing will be next Sunday, Oct. 16th.

*************************************************************************************
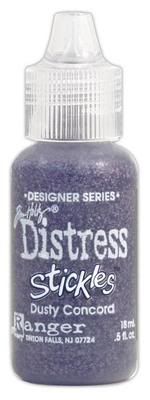
Coming to your inbox very soon will be our October coupons! As always, spend $10 in regular merchandise (classes, kits and crops don't count!) and you'll get a free bottle of our Limited Edition Stickles. This month, it's a very pretty purple distressed Stickle called Dusty Concord (pictured below).


distressed stickles
Unsure of how to use the Distressed Stickles? Look for an upcoming blog post all about them! :-)

The other October coupon is 15% off all Tim Holtz product! If you're not familiar with Tim Holtz yet, now is a great time to try it out! Look for a new Tim Holtz class coming soon!

To receive our monthly coupons and information about upcoming events and classes, sign up for our email list by emailing us at info@shopcapture.com or call 970-484-0595.

Wednesday, October 5, 2011

Paper Crafting, Halloween Style!

Believe it or not, Halloween is almost here! That means candy corn, carving pumpkins, costumes, and most of all, PAPER CRAFTING! :-)


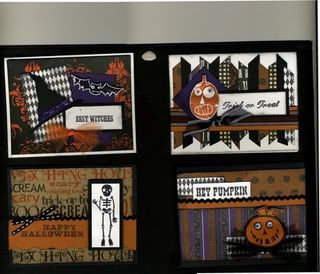
Have you started on your Halloween cards yet? If not, Capture has you covered! Join us this Saturday (Oct. 8th) from 1-3pm for this cute Halloween Cards Class!

Photobucket


If you're more into page layouts or home decor, why not make a fun Halloween banner for your page or mantle? 

Banners are all the rage right now, and they're so easy to make! Create tiny ones for cards, pages or treat bags, or bigger ones for the home. The most common ones are made using triangles, but you can change it up a bit and make a square or rounded banner too! 


Just cut out the desired number of banner pieces, string them up on rope, twine, ribbon or wire, and add your own designs or letters.


Here are some pics from CHA for inspiration:

canvas banner

bella blvd. banner

bella blvd banner

To REALLY get you in the mood for creepy crafting, sign up for our Bloody Halloween Crop on Friday, Oct. 28th from 6-11pm!  

We will have the work space decorated for Halloween with inspiration from the hit shows "Dexter" and "True Blood".

Come dressed in your best costume for a chance to win a special prize! The spots will fill up FAST so be sure to sign up today!


For more information on these classes, crops and banner pics, call 970-484-0595 or email us at: info@shopcapture.com