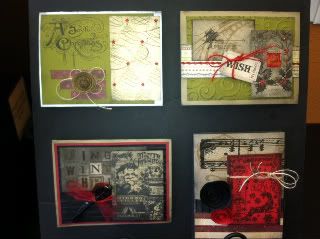
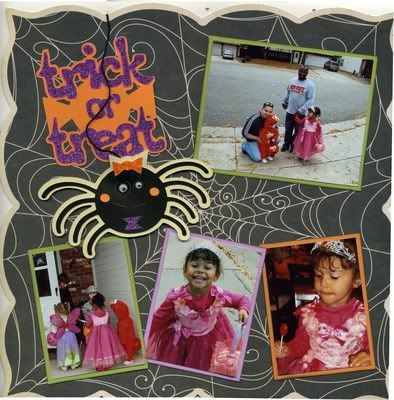
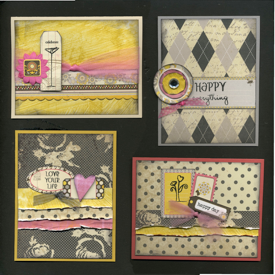
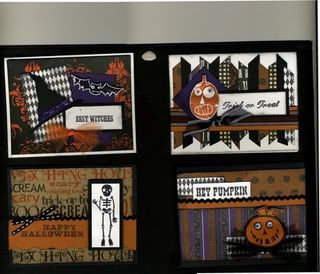
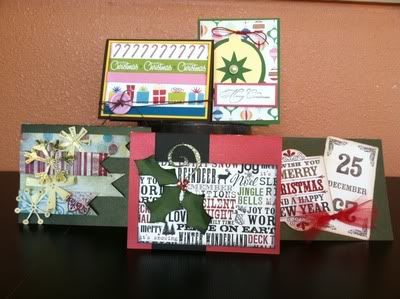
If you are behind on your Christmas cards this year (or just overwhelmed!) why not pick up a couple of Christmas Card Kits to make this holiday season a little easier?
Choose from a variety of individual card kits at $3 each, or pick up a class kit and get 4 cards, all pre-cut and ready to assemble! What could be easier? We can even ship the kits to you!
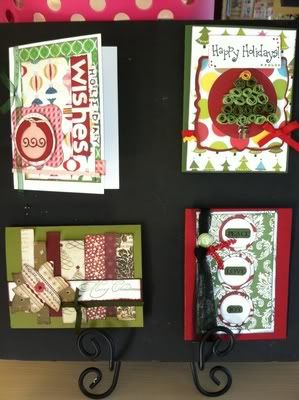
Take a peek at what we have available now:
Individual Card Kits: $3 ea.
Christmas Cards (4 different cards in one set): $12
Tim Holtz Inspired Christmas Cards: $15 for the set of 4
There are more to choose from in the store!
Don't have time to assemble them? Let us do it for you! Just an extra $1/card!
Visit www.shopcapture.com or call 970-484-0595 for details.
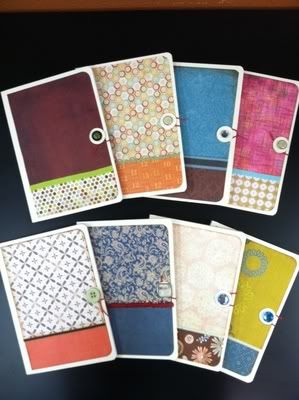
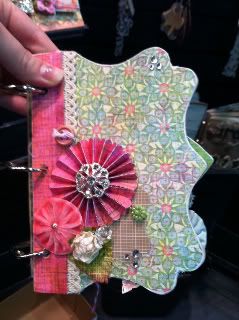
Looking for an inexpensive and unique gift idea? Check out our assortment of personal journals, just $5 each!
And you won't want to miss our Handmade Items & Craft Storage Sale, going on Dec. 19th - 24th! Take an extra 10% off all handmade items and craft storage! They make wonderful gifts!
(Sale excludes custom orders and cannot be combined with any other discount offer)
Have a safe and fun Holiday season, and as always, Happy Scrapping!
:-)
-Jess
Follow us!
▼
See our current kit selection!
▼
Wednesday, December 7, 2011
Tuesday, November 8, 2011
Top 10 Gifts for $10 or Less!
The holiday shopping season is upon us, and this year Capture has the gifts you need for a crafty loved one!
In this post we'll highlight the Top 10 gift items for $10 or less! Great for stocking stuffers or to add on to one of our quick & easy kits! Get your shopping list ready as you check out these wonderful items, and remember, we can ship these!
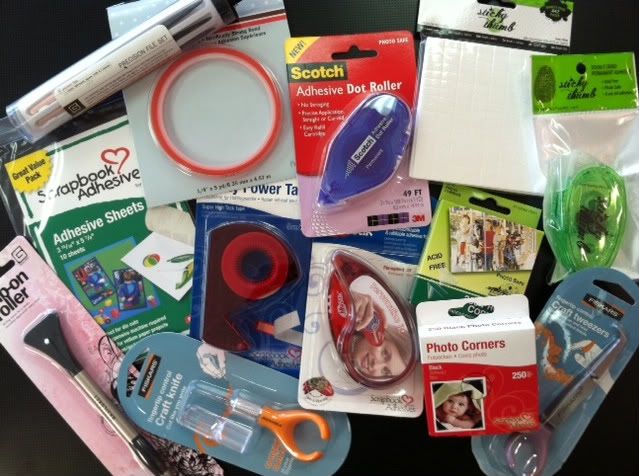
#1: Tools and Adhesives
$3.00-$10.00
These are the paper crafting basics, and every crafter needs them to complete their projects! Now is the perfect time to stock up on your "can't live without them" tools and adhesives, or try new ones you haven't tried before!
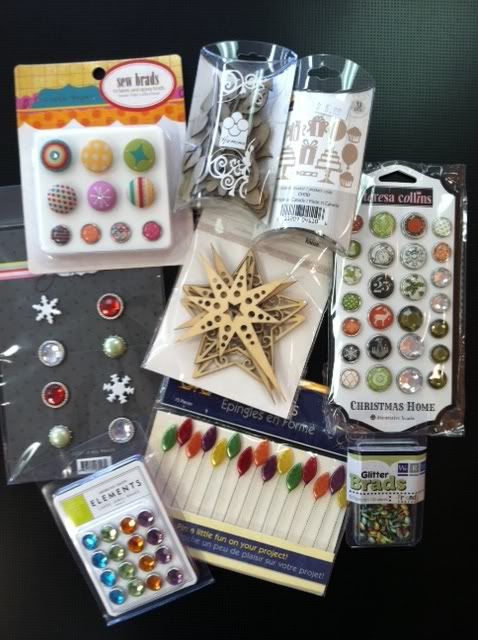
#2: Embellishments
$3.00-$9.00
If you're looking for a way to take your project to the next level, look no further than these adorable embellishments! Brads, wood cut accents and pins are a great way to add that "WOW" factor to your crafts!
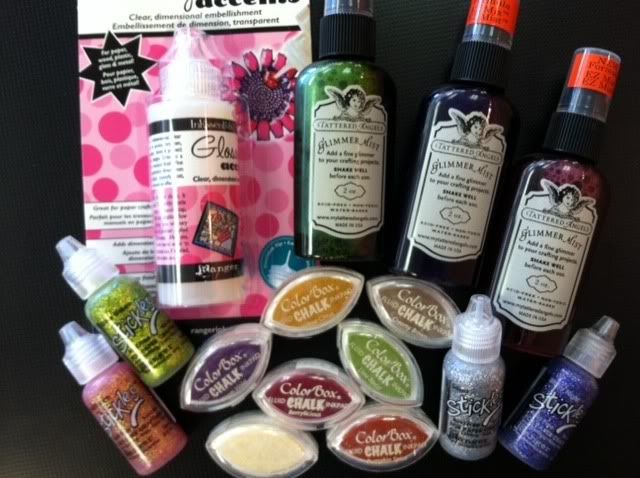
#3: Stickles, Cat Eye Inks, Glossy Accents and Glimmer Mist
$2.50-$9.00
Fun and versatile, these colorful items add just the right finishing touch to your project. We use them on just about EVERY class example we create! What a great time to branch out from your usual colors and pick something new and vibrant to try!
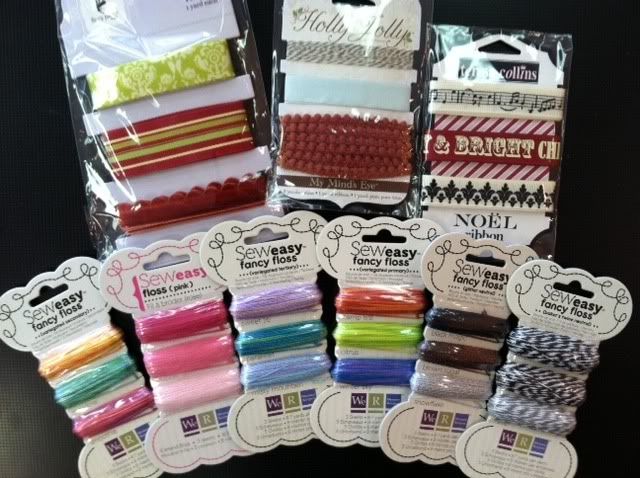
#4: Ribbons, Floss and Trim
$4.00-$6.00
Adding a touch of ribbon or trim to your crafts gives them wonderful texture, and can be a good way to attach smaller items such as buttons, charms and tags. These pre-packaged assortments contain a variety of coordinating colors that are great when used together or individually!
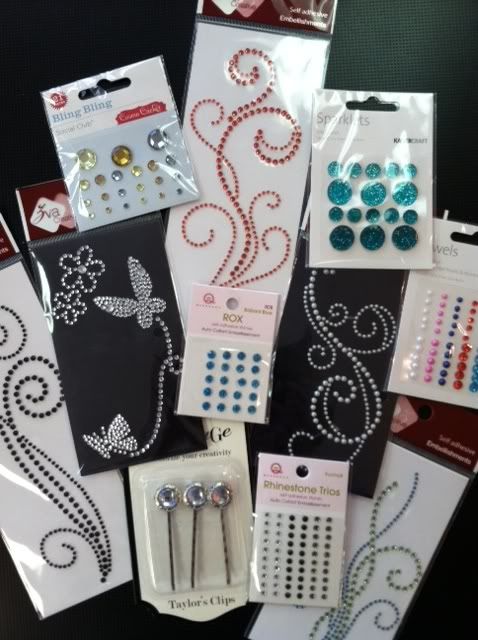
#5: Sparkles and Rhinestones
$2.00-$6.00
What project is complete without a little bling? Make a statement with a big swirl, or add delicate touches of sparkle with individually placed rhinestones.
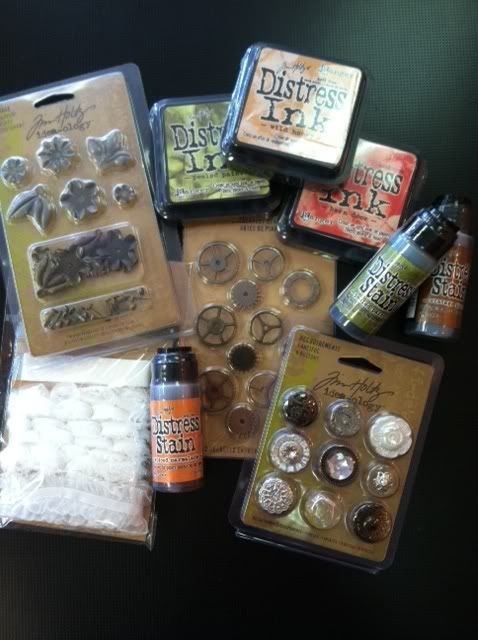
#6: Tim Holtz Embellishments
$6.00-$10.00
These embellishments and trims are perfect for adding a touch of vintage grunge to your projects!
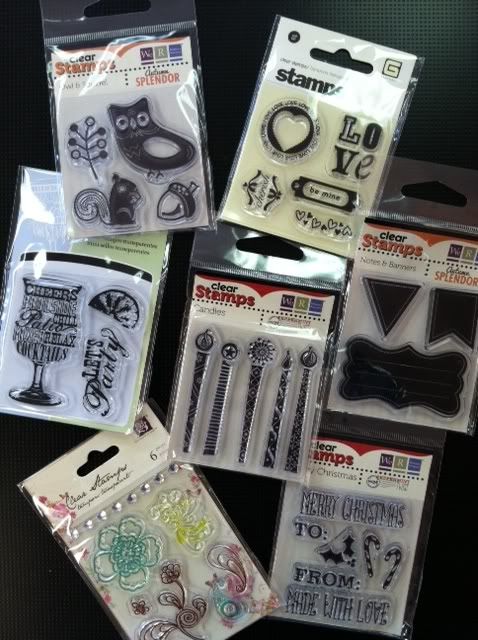
#7: Mini Stamps
$3.00-$5.00
Great for cardmakers and scrapbookers alike, these mini stamp sets are a perfect accent on your card or page. Stamp them on both solid and patterned papers and layer them for a great paper piecing effect!
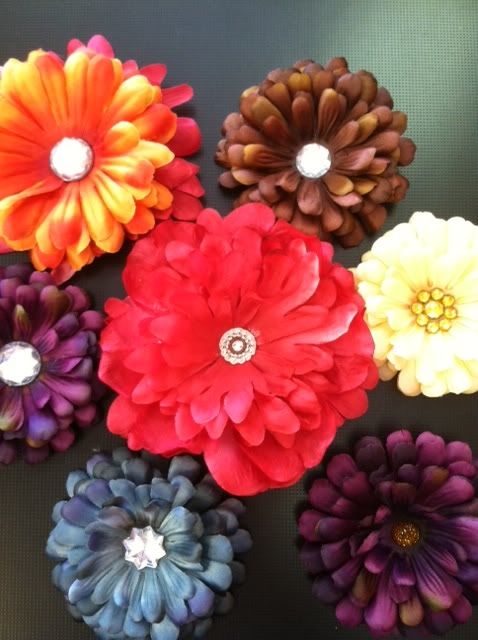
#8: Flowers
$4.00-$6.00
These whimsical flowers make an elegant statement, and look great on pages, cards, picture frames or mini albums. You can even glue them to a hair clip and wear them in your hair!
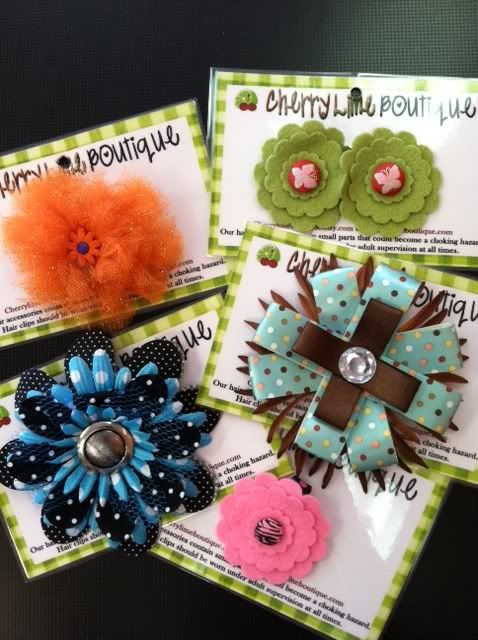
#9: Handmade Hair Accessories
$6.00-$10.00
Perfect for girls of ANY age, these handmade hair accessories from both Capture and Cherry Lime Boutique will really make a statement! Not just for your hair, these pretty flowers can be added to your favorite hats, purses, scarves or sweaters!
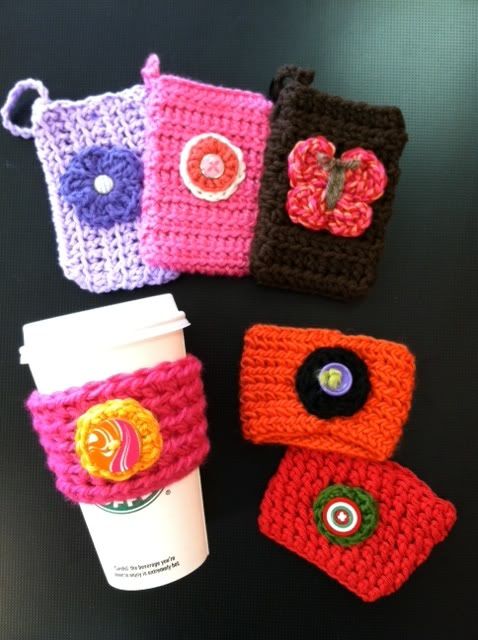
#10: Hand Crocheted Cozies from The Crafty Kitty
$8 ea.
Handmade gifts are a great way to let somebody know you care! These cell phone/camera cozies and coffee sleeves can be custom ordered and tailored to your needs. Get one of each and make them a matching set! Come in and see what The Crafty Kitty can make for you!
That wraps up our Top 10 Gifts For $10 Or Less! We hope you found some great items for a special someone (or to add to your own Wish List)! For more information on these and other products, call us at: 970-484-0595, or send an email to: info@shopcapture.com
Happy Scrapping!
-Jess
Friday, October 21, 2011
Weekly Tips & Techniques: Stretching your stickers!
This week's tip is brought to you from the Fancy Pants blog, "Miss Fancy Pants". Here Lisa shows you more ways to use your stickers using the October 31st sticker sheet (available at Capture!) After reading this I can't wait to dig into my sticker stash to see how else they can be used! Hopefully it will inspire you as well!
Happy Scrapping!
-Jess
I’ve been creating with the Element Stickers from the Oct. 31 line this week. I love finding different ways of using the same product. So when I got asked to use the Element Stickers in 2 ways I knew instantly what I was going to do.
I really have used the one product in 2 ways.
First of all I made this LO here.
I’ve used the patterned papers from the October 31 line as my base. I wanted to use the Element Stickers but give them a bit of life. Stickers are great, but can appear flat sometimes. So I’ve stuck these on to black card and then cut around to show a black edge. Some of the stickers I’ve just stuck down using double sided tape and some of them with 3d foam tape. I like seeing the variation of heights. You can see a close up here. The stickers now pop!
Now I am left with a sticker sheet looking like this.
There are empty spaces where I have used some of the stickers on my first project. It’s the empty spaces that I’m now going to use on my next LO.
I have carefully cut around the used stickers. You can see the outline of where the sticker has been removed. This is where I have cut and this then gives me a new sticker. I’ve lightly placed this sticker onto the LO and then misted over it. The sticker can then be lifted and you are then left with this effect. They make perfect masks for misting.
I used some of the stickers from the ‘off to school’ collection. I separated these banners, stuck them onto white card and cut them out. By punching two holes into each flag I’ve been able to thread some twine through and turn them into a string of bunting. They’ve been stuck down with 3d foam tape.
I also used a part on the scalloped edge border sticker to stick on the page and mist over. This gives a great effect. The sticker can still be used. I ended up using it on the bottom of the first LO above. The mist has given it a great shimmery look.
Here is the finished LO.
It really is possible to use the one sheet of Element Stickers in 2 ways : )
-Lisa Saunders
Happy Scrapping!
-Jess
1 Product, 2 Ways: Oct. 31 Elements Stickers
I’ve been creating with the Element Stickers from the Oct. 31 line this week. I love finding different ways of using the same product. So when I got asked to use the Element Stickers in 2 ways I knew instantly what I was going to do.
I really have used the one product in 2 ways.
First of all I made this LO here.
I’ve used the patterned papers from the October 31 line as my base. I wanted to use the Element Stickers but give them a bit of life. Stickers are great, but can appear flat sometimes. So I’ve stuck these on to black card and then cut around to show a black edge. Some of the stickers I’ve just stuck down using double sided tape and some of them with 3d foam tape. I like seeing the variation of heights. You can see a close up here. The stickers now pop!
Now I am left with a sticker sheet looking like this.
There are empty spaces where I have used some of the stickers on my first project. It’s the empty spaces that I’m now going to use on my next LO.
I have carefully cut around the used stickers. You can see the outline of where the sticker has been removed. This is where I have cut and this then gives me a new sticker. I’ve lightly placed this sticker onto the LO and then misted over it. The sticker can then be lifted and you are then left with this effect. They make perfect masks for misting.
I used some of the stickers from the ‘off to school’ collection. I separated these banners, stuck them onto white card and cut them out. By punching two holes into each flag I’ve been able to thread some twine through and turn them into a string of bunting. They’ve been stuck down with 3d foam tape.
I also used a part on the scalloped edge border sticker to stick on the page and mist over. This gives a great effect. The sticker can still be used. I ended up using it on the bottom of the first LO above. The mist has given it a great shimmery look.
Here is the finished LO.
It really is possible to use the one sheet of Element Stickers in 2 ways : )
-Lisa Saunders
Wednesday, October 19, 2011
This Week At Capture (10/17 - 10/23)
Here's what's going on this week at Capture:
Thursday, 10/20
Thursday Page Club: 7-8pm
Make one 12x12 layout for just $5 while you spend some time with friends!
Friday, 10/21
Crochet Class: 6-8pm
Join Jessica this Friday evening and learn how to crochet! Already know how? Come in and use the workroom for free while you finish up your knitting/crocheting project and meet new friends!
$6 if you bring in your own hook & yarn, $12 if we provide it for you.
Saturday, 10/22
Just Cards: 1-3pm
Make these 4 gorgeous cards that are perfect for any occasion!
Scrap Night: 6-11pm
Spend a fun evening working on your projects, spending time with friends, meeting new people and getting some new ideas. Light refreshments will be served. Use of our tools and cutting systems is included. $10 for the evening.
Sunday, 10/23
Halloween Pages #1: 1-3pm
Celebrate Halloween in style with these four great pages by Angela!
$20 for 4 pages
For information on these classes and more, visit www.shopcapture.com, or call 970-484-0595
Wednesday, October 12, 2011
Weekly Tips & Techniques: Journaling
Have you, like me, been stuck in a non-journaling rut lately? It can seem so tricky and intimidating! But journaling is important to scrapbooking, and can help those looking at your layouts understand what is going on in the pictures and who is in them.
It doesn't have to be so hard! Here are a few tips to get you in the groove with journaling:
1. Wait until later to do it.
When you start to write do you find yourself frozen with nothing but a blank stare while you struggle to come up with something to say about the layout you just created? That might be because when you create pages, you're using your right-brain activity. When you are writing, you're using your left-brain activity. It can be so hard to switch back and forth between the two! Don't stop your creative layout process when you are on a roll. Simply make a space for your journaling and come back to it later. (But don't wait too long or you will forget important details about the event or forget to do it altogether.) A good idea would be to wait until you are done with your layouts from that particular event and then go back for the journaling.
2. Use a dictionary and a thesaurus.
Sometimes it's as simple as using a particular word for your title and then putting the definition of that word under it as your journaling. It's a basic and quick way to add a bit of wording to your layout, especially for pictures that don't need a lot of explaining or details. Here is a layout I found at A Cherry On Top for example:
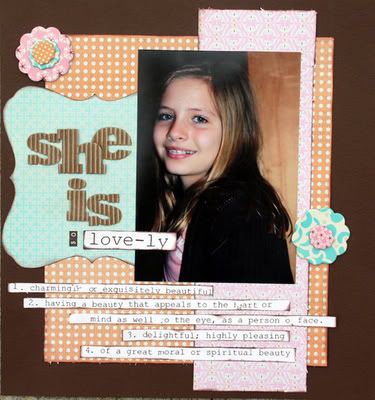
Using a thesaurus is always helpful in finding more descriptive words to replace ones you might use too often (like I do!) or ones that just aren't quite cutting it.
3. Just document the facts.
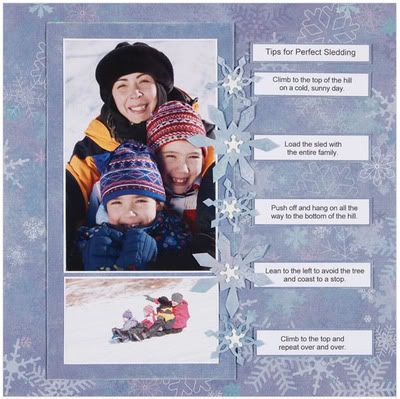
You don't have to struggle to come up with a clever or witty way to describe what is happening in your photos. Simply jotting down the facts will do! A good way to make this more visually appealing is to use bullet points or strips of paper for each sentence. Don't forget to include the date and who is pictured! Here's a layout from Simply Special Crafts for inspiration:
4. Use song lyrics, poems or quotes.
This is a wonderful "cheat" when it comes to journaling. A great source of inspiration can come from your favorite song or poem, and quotes can be perfect for capturing the feeling of a photo or event! There are plenty of resources out there available for purchase, but I find the best source is Google. ;-)
5. Do an interview.
Some of the most amusing journaling spots I've seen are interviews with the person(s) pictured. This is especially cute when it's with children! Get the "Who, What, When, Where and Why" and you can either copy it down word for word or use it as your inspiration.
6. Don't sweat it!
Scrapbooking is supposed to be a fun stress reliever, not something to worry about! If you find yourself really straining to come up with something to write down on your layout, maybe that particular page doesn't NEED any journaling. When I'm deciding what to write and I can't think of anything at all, I ask myself, "if I wasn't around to talk about this layout, would the person looking at it know what was going on? Does it need any explanation?" If a layout simply doesn't need journaling to accompany it, just let the picture do the talking. After all, a picture is worth a thousand words!
Once the content of your journaling is decided, you'll want some creative ways to display it. I like hand written journaling best, since it gives the page a more personal feel. If you are unhappy with your handwriting, practice on some scrap paper first until you get used to it. I like to practice first just to get my spacing right. If there is just NO way you want your own handwriting on your layout, you can always type it up and print it off. This is especially handy for the longer stories you want to document. But keep in mind a loved one would be thrilled to see the personal touch of your own writing, no matter how YOU think it looks. :-)
Here are some creative ways to display your journaling:
*Use it as a border, next to or in place of a strip of patterned paper or ribbon.
*Write around a photo.
*Journal in a shape (a basic heart or circle is great, or use a more funky shape, like a child's handprint)
*Use pre-made journaling tabs, mats or stickers.
* Journal inside or around a stamped shape, or use a lined stamp made for journaling.
*Create a hidden journaling spot on a tag or scrap of paper that gets tucked into a pocket or flap. This is especially nice for mini albums that don't have a lot of room for both the photos and the journaling!
Remember, there are no mistakes in scrapbooking, just opportunities for embellishment. So if you've goofed up your writing, look at it as practice and cover it up with another piece of paper! :-)
I hope this has given you some tips and inspired you to write more on your scrapbook pages! Click here for more great tips on journaling.
Happy Scrapping!
-Jess
Monday, October 10, 2011
This Week At Capture (10/10 - 10/16)
Here's what's coming up this week at Capture:
Thursday, Oct. 13th
Thursday Page Club: 7-8pm
Make one great 12x12 page while you visit with friends!
Only $5!
Friday, Oct. 14th
Scrap Night: 6-11pm
Spend a fun evening working on your craft projects while you meet new people and enjoy some refreshments! Just $10 for the evening.
Saturday, Oct. 15th
Limited Edition Fall Album: 1-3pm ( $30 )
Capture your favorite fall memories with this elegant Fall Album! These pics don't do it justice at all! The completed album measures 6x12 with each page getting wider than the one before it, creating a cascade of autumn colors. As of this blog post there are only THREE (3) kits left for this class, so be sure to sign up right away!
Sunday, Oct. 16th
Just Pages: 1-3pm
The October Just Pages features two single pages and one 2-page spread that will be perfect for any occasion!
$20 for 4 pages
For information on these and other events, call 970-484-0595 or visit www.shopcapture.com.
Don't forget to follow us on Facebook for exclusive deals and pics of brand new product as it hits the floor!
Friday, October 7, 2011
New Specials and the October Coupons!
If you're not following our Facebook Fan Page yet, you should be! We have special deals and promos just for our Facebook Fans! Check it out...
Our newest "Check In" deal will be starting this weekend: check in 2 times on your mobile device (on either Facebook or Foursquare) and when you buy one kit, you'll get a second one half off! (Discounted kit must be of equal or lesser value. Offer expires 10/31/2011)
Our "Check In" deals change periodically, so check back and check in often!
Also on Facebook, starting this week we'll be having a "Facebook Fan of the Week"! The rules are simple: create a project using materials purchased at Capture, post a pic of it on our Fan Page, and we will pick one lucky winner each week to enjoy 15% off their next purchase! You have to be a "fan" to participate, so be sure to "like" us and then get working on your Capture project! Our first drawing will be next Sunday, Oct. 16th.
*************************************************************************************
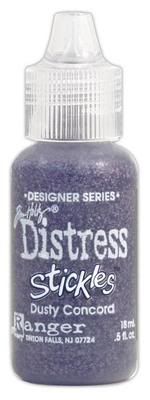
Coming to your inbox very soon will be our October coupons! As always, spend $10 in regular merchandise (classes, kits and crops don't count!) and you'll get a free bottle of our Limited Edition Stickles. This month, it's a very pretty purple distressed Stickle called Dusty Concord (pictured below).
Unsure of how to use the Distressed Stickles? Look for an upcoming blog post all about them! :-)
The other October coupon is 15% off all Tim Holtz product! If you're not familiar with Tim Holtz yet, now is a great time to try it out! Look for a new Tim Holtz class coming soon!
To receive our monthly coupons and information about upcoming events and classes, sign up for our email list by emailing us at info@shopcapture.com or call 970-484-0595.
Wednesday, October 5, 2011
Paper Crafting, Halloween Style!
Believe it or not, Halloween is almost here! That means candy corn, carving pumpkins, costumes, and most of all, PAPER CRAFTING! :-)
Have you started on your Halloween cards yet? If not, Capture has you covered! Join us this Saturday (Oct. 8th) from 1-3pm for this cute Halloween Cards Class!
If you're more into page layouts or home decor, why not make a fun Halloween banner for your page or mantle?
Banners are all the rage right now, and they're so easy to make! Create tiny ones for cards, pages or treat bags, or bigger ones for the home. The most common ones are made using triangles, but you can change it up a bit and make a square or rounded banner too!
Just cut out the desired number of banner pieces, string them up on rope, twine, ribbon or wire, and add your own designs or letters.
Here are some pics from CHA for inspiration:
To REALLY get you in the mood for creepy crafting, sign up for our Bloody Halloween Crop on Friday, Oct. 28th from 6-11pm!
We will have the work space decorated for Halloween with inspiration from the hit shows "Dexter" and "True Blood".
Come dressed in your best costume for a chance to win a special prize! The spots will fill up FAST so be sure to sign up today!
For more information on these classes, crops and banner pics, call 970-484-0595 or email us at: info@shopcapture.com
Wednesday, September 14, 2011
Upcoming Events (and a SALE!!)
Check out these awesome upcoming events at Capture that you won't want to miss!
New Product Open House and SALE!
Saturday & Sunday, Sept. 17th & 18th
Stop in and see all the wonderful new Christmas products that will be hitting the floor in October while you enjoy some light refreshments!
Take advantage of our SALE while you're here too:
15% off all storage and past class kits!
(Excludes new product kits and current class kits. Discount not available in conjunction with Groupon offer.)
Check out the Facebook Event for it here.
Weekend Crop 2!
Friday - Sunday, Sept. 23rd - 25th
Our last Weekend Crop was a huge hit, and you won't want to miss this one!
Join us for 1, 2 or all 3 days while you work on your crafts and meet new people! Great food and prizes all weekend long!
Attend two or more days and get a discount!
Friday: $15 (6-11pm)
Saturday: $30 (10-10pm)
Sunday: $20 (10-4pm)
Sign up in store or online.
Fall Festival & Crop Night
Saturday, Oct 1st (Festival:10-3pm, Crop Night: 6-11pm)
Join Capture and many other great local businesses and vendors for a day of family fun at our Fall Festival!
Activities include:
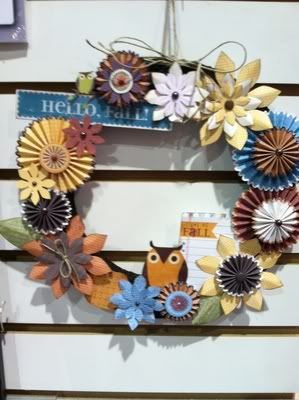
Face painting by Best Face Painters, make & takes from Capture, a visit from a princess by Once Upon A Party (including story time at 11:00am in Capture's workroom), a bouncy castle, a karate demonstration by Quest Academy of Martial Arts, magic tricks from Light Entertainment, a dance performance by Colorado Academy of the Arts, and some great food including Mama Roni's Pizza!
See the Facebook Event here.
Wednesday, August 24, 2011
Weekly Tips & Techniques: Fan Fold Flowers
Hello everyone!
Today I'm bringing you a video on fan fold flowers. These flowers are EVERYWHERE. We saw so many displays at CHA using these little cuties, and they are so easy to make! Here are some examples:
All you need is a 12"x 1" (approximately) scrap of paper and some super sticky glue! If you have a scorer it will help you make the little folds much easier. Try practicing with some scraps first.
See a video on how to make them here.
Happy Scrapping!
-Jessica
Monday, August 22, 2011
Upcoming Events at Capture
We have so many AWESOME and exciting events coming up that you won't want to miss!
Check them out:
*Croptini
Saturday, Aug. 27th (6-11pm)
Join us for a night of cocktails and great music while you work on your craft projects!
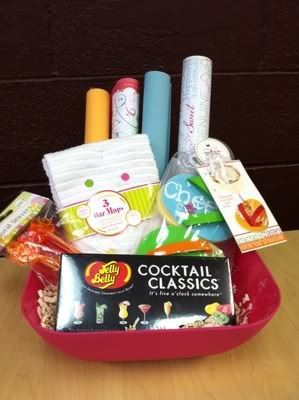
Everyone who attends the crop will have a chance to win this prize basket:
There are only a couple seats left, so book yours TODAY by calling 970-484-0595.
*Semi-Annual Garage Sale
Saturday, Sept. 10th (10am-5pm) & Sunday, Sept. 11th (11am-4pm)
Score some great deals on craft and scrapbooking supplies at our Semi-Annual Garage Sale!
Have some items you'd like to sell? Sign up to be a seller and get store credit for your unwanted items! You do not have to man your table. Just set it up and we will do everything for you! Call for details.
*New Product Open House
Saturday, Sept. 17th (10am-5pm) and Sunday, Sept. 18th (11am-4pm)
We still have so much great product rolling in that we decided to have another open house just to display it all! Come see our wonderful Holiday lines coming in while you enjoy some refreshments. You'll want to snag it up before it's gone forever! Bring a friend for twice the fun!
*Weekend Crop
Friday, Sept. 23rd - Sunday, Sept. 25th
If you missed the last Weekend Crop, you'll want to be sure to attend this one! Great food and fantastic prizes ALL WEEKEND LONG. Attend two or more days and get a discount! Seats are limited, so sign up today while you still can!
*Fall Festival and Crop
Saturday, Oct. 1st (10am - 3pm)
Join Capture and many other great local businesses for a day of family fun! There will be great food, fun vendors and lots of fun things for the kids including a bouncy castle, face painting and a visit from a princess! Admission is free so bring the whole family!
Stay after the Festival for our Fall Crop (6-11pm)
The perfect time to get caught up on your projects!
For more information on these and other great events, call 970-484-0595 or visit www.shopcapture.com
Wednesday, August 17, 2011
Weekly Tips & Techniques: Cricut Tips
This week I'm bringing you some tips on the Cricut machine, in honor of this Sunday's Cricut Party, where we will demo our new Cricut Imagine and Cricut Books (and have some great prizes to give away!)
As many of you have your own personal Cricut machine, I'm sure you've noticed how quickly the mats loose their "sticky". There are a couple of things you can do do liven them back up and extend their use:
-Scrape any leftover paper bits and fuzz off of your mat with the Cricut Spatula. Sometimes this trick alone works at making your mat more sticky, but it's mostly to help prepare you for the next step...
-Spray your mat with spray adhesive! It's important that you tape the edges off first so you don't get spray adhesive on the parts that aren't supposed to be sticky! Once you have put a decent amount of spray on your mat, take the tape off the edges and let your mat dry.
-An alternative to the spray is to use a Zig 2 Way Glue Pen. I literally just found this tip recently and have not tried it myself, but the writer of the blog Imperfectly Beautiful says it works even better than the spray! It will take a lot longer to apply and let dry than the spray does, but it might be a good thing to try!
-A tip I read at Psycho Moms Society said to wash your mat with Dawn dish soap. This is supposed to remove the dust and dirt but leave the adhesive! (Who knew?!)
-Extend the life of your mat by using more than just the main corners for cutting. Most people know you can flip your mat upside down and load it from the "bottom" to have it cut on the opposite corner it usually starts on, but did you know you can put it in "portrait" mode and it will start cutting in the top left hand corner? This can help you spread out the wear and tear to all 4 corners of your mat, helping it to last longer!
-Another way to extend your mat life is to put your paper and blade toward the center of the mat to cut. This works best if you are making smaller cuts, since you will have less room to work, but it will help keep your mat in top shape!
Other tips:
-Make sure the little arrow on your blade housing is facing directly out toward you. This helps it cut the best.
-Another one from Psycho Moms Society: Air Cuts
"Have you ever had a scrap piece of paper and didn't know if you had enough room to cut a design from your cricut? Place the blade depth to 1 and the pressure dial setting to 1, then cut your design. The Cricut is designed to not apply pressure to the paper in this dial setting, so it will perform an "air cut". Make a mental note of the results. If you are satisfied, then return the blade to the original position, pressure, and depth, and repeat the cut. "
-A great tip from Obsessed With Scrapbooking is to use this Cricut settings table to make sure you always have the correct blade and pressure setting with the paper you are using. She also has a YouTube channel with more fun tips, tricks and tutorials to check out!
-When you cut out something really tiny, like letters, the best way to glue them down is with either a Xyron Sticker Maker, a Glue Pen, or some Adhesive Sheets from Scrapbooking Adhesives (all available at Capture!)
If you have any Cricut tips you'd like to add we would love to hear them! Just post in the comments section below.
Happy Scrapping!
-Jessica
Monday, August 15, 2011
This Week At Capture: 8/15-8/21
Here's what's coming up this week at Capture:
Thursday, Aug. 18th
Thursday Page Club (7-8pm)
$5
Make one great 12x12 page and enjoy some quality crafting time with friends!
Friday, Aug. 19th
NEW CLASS: Learn To Crochet! (6-8pm)
$12
Want to learn how to crochet? This class is for you! Learn some basic stitches and start your own scarf. Attend the class and get yarn and a hook for FREE!
Already a knitter or crocheter? Join us during the class for open crafting time and get caught up on your project while you meet new people!
Saturday, Aug. 20th
Limited Edition Pages (1-3pm)
$24 for 4 pages
More great Limited Edition Pages!
Get them before they are GONE!
Sunday, Aug. 21st
Just Pages (1-3pm)
$20 for 4 pages
Each month a different one of our amazing designers will create four versatile pages you will not want to miss out on!
Cricut Party: Sunday, Aug. 21st
Join us at 1:00pm and again at 3:00pm while we demo our brand new Cricut Imagine and Cricut Books, full of wonderful paper crafting ideas!
We'll be giving out lots of great prizes, so don't miss it!!
To register for these classes and more, visit www.shopcapture.com or call 970-484-0595